Installation Guide
Follow these instructions to install Manusly on your system. Choose your operating system below for detailed steps.
macOS Installation
- Download the DMG file for your Mac (Intel or Apple Silicon)
- Open the downloaded DMG file
- Drag Manusly.app to your Applications folder
- Eject the DMG disk image
- Open Manusly from your Applications folder
- If you see a security warning, go to System Settings → Privacy & Security and click "Open Anyway"
Windows Installation
- Download the .exe installer
- Run the installer and follow the setup wizard
- Launch Manusly from the Start menu or desktop shortcut
- If you see a Windows SmartScreen warning, click "More info" then "Run anyway"
Linux Installation (AppImage)
- Download the AppImage file
- Make it executable:
chmod +x Manusly-1.0.2-x86_64.AppImage - Double-click to run or run:
./Manusly-1.0.2-x86_64.AppImage
System Requirements
Ensure your system meets these minimum requirements to run Manusly effectively.
macOS
- macOS 11.0 (Big Sur) or later
- Intel: 2015 or newer / Apple Silicon: M1, M2, M3, or M4
- 8 GB RAM minimum (16 GB & good CPU recommended for LLM models)
- 500 MB disk space
Windows
- Windows 10 or Windows 11 (64-bit)
- 8 GB RAM minimum (16 GB & good CPU recommended for LLM models)
- 500 MB disk space
Linux
- Ubuntu 20.04+ / Fedora 35+ / other modern distributions
- 64-bit processor
- 8 GB RAM minimum (16 GB & good CPU recommended for LLM models)
- 500 MB disk space
Interface Overview
Manusly features a modern, intuitive interface designed for efficient LaTeX editing. This guide will walk you through the main sections of the application, helping you navigate and utilize all available features effectively.
Before accessing the main workspace, Manusly presents authentication options for users who wish to sync their projects across devices and access cloud features.
Sign In

The sign in window allows existing users to access their Manusly account.
Existing users can sign in using their email address and password, or alternatively sign in with Google or GitHub. Enter your credentials (or click a provider button) and click "Login" to access your account. If you don't have an account yet, click "Sign up" to create one.
Create Account
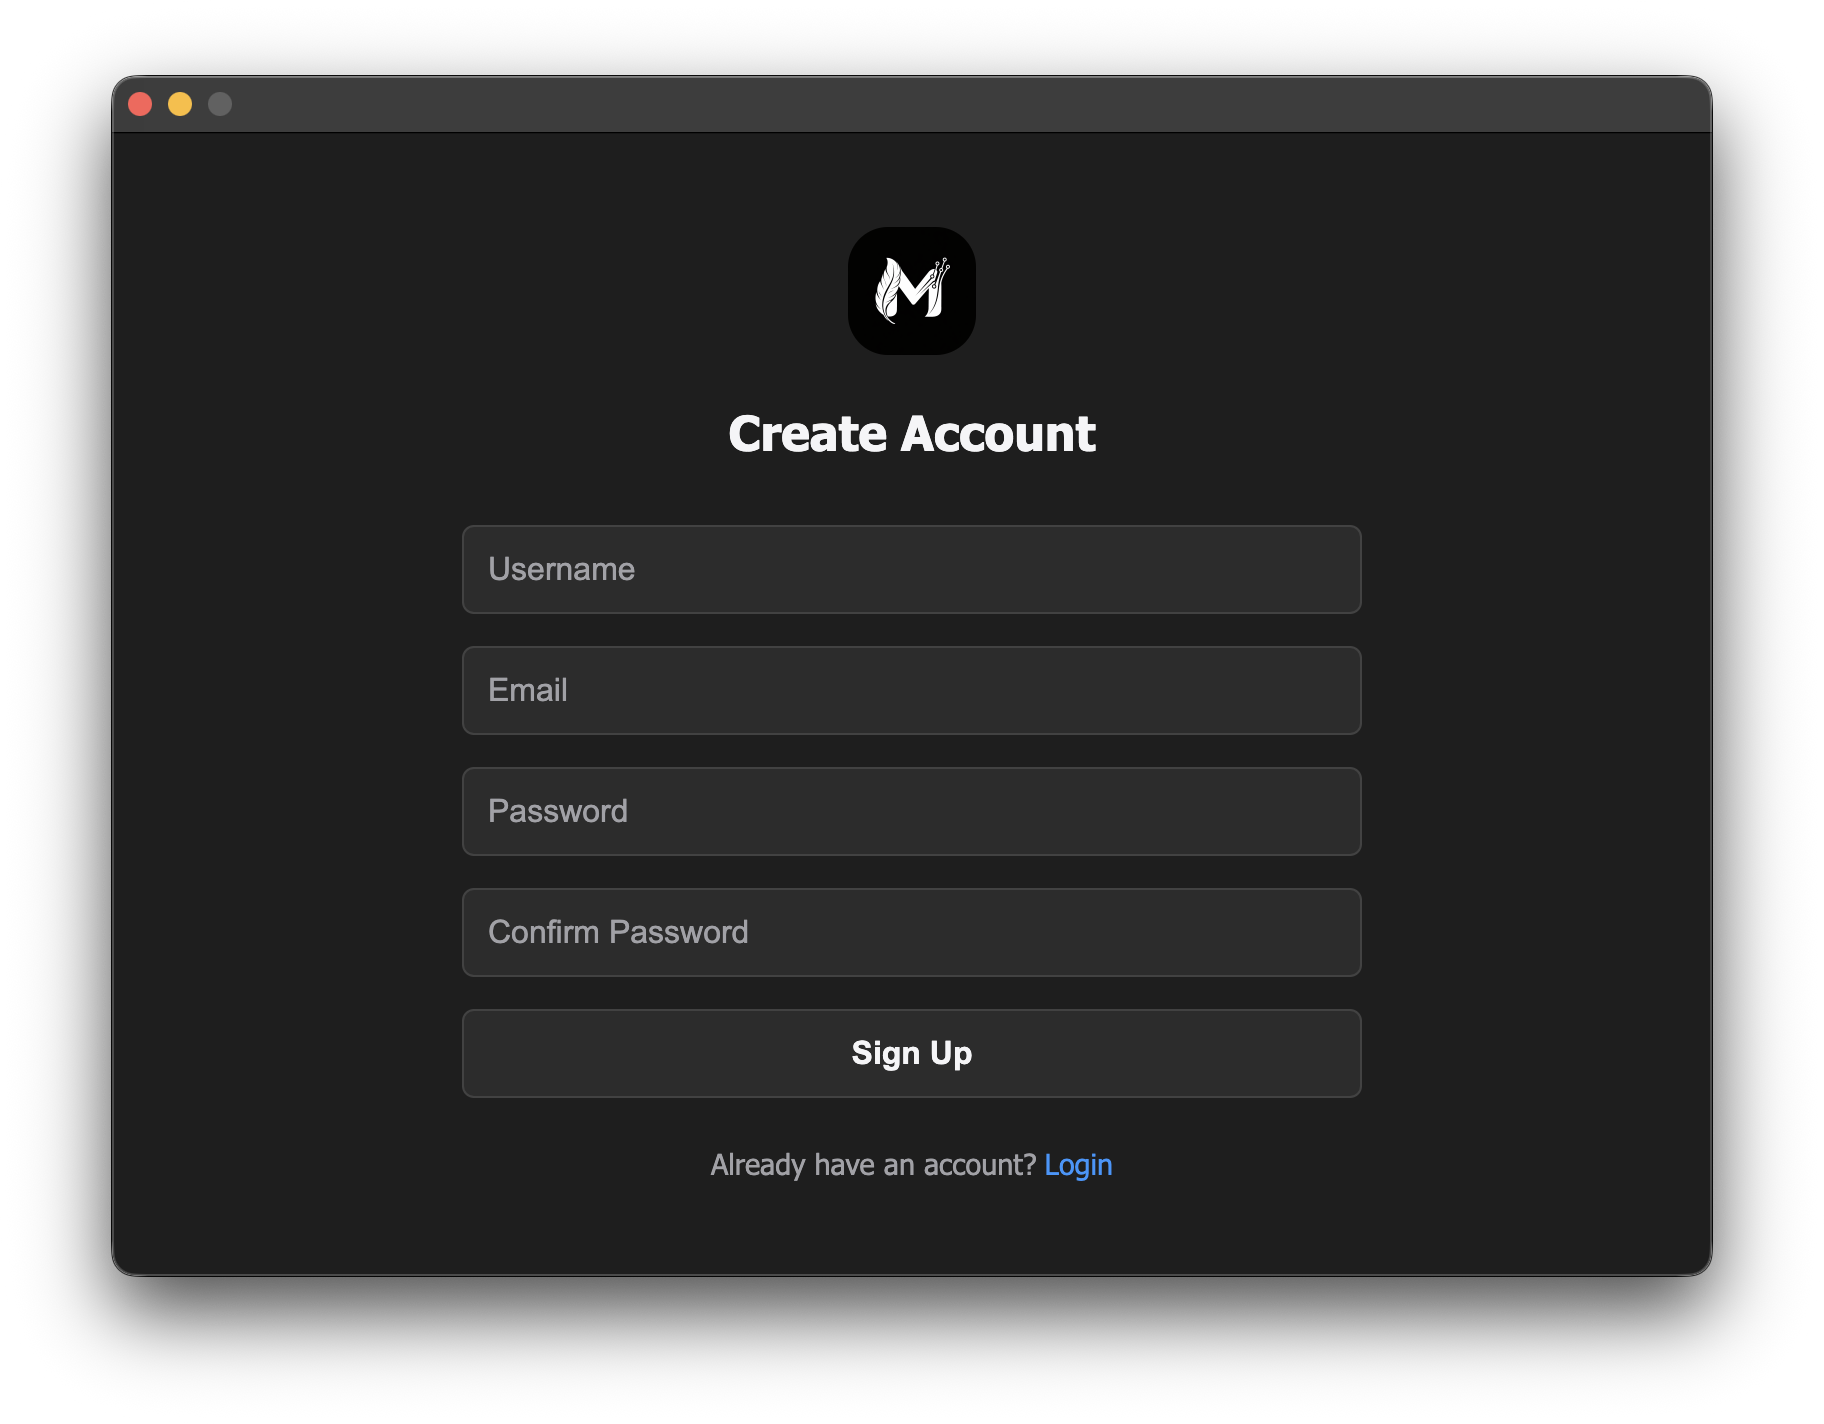
The account creation window allows new users to register for a Manusly account.
New users can create a Manusly account by providing a username, email address, and password, or alternatively sign up with Google or GitHub. Confirm your password by entering it again (or use a provider button). Click "Sign Up" to create your account. If you already have an account, click "Login" to sign in instead.
Welcome Window
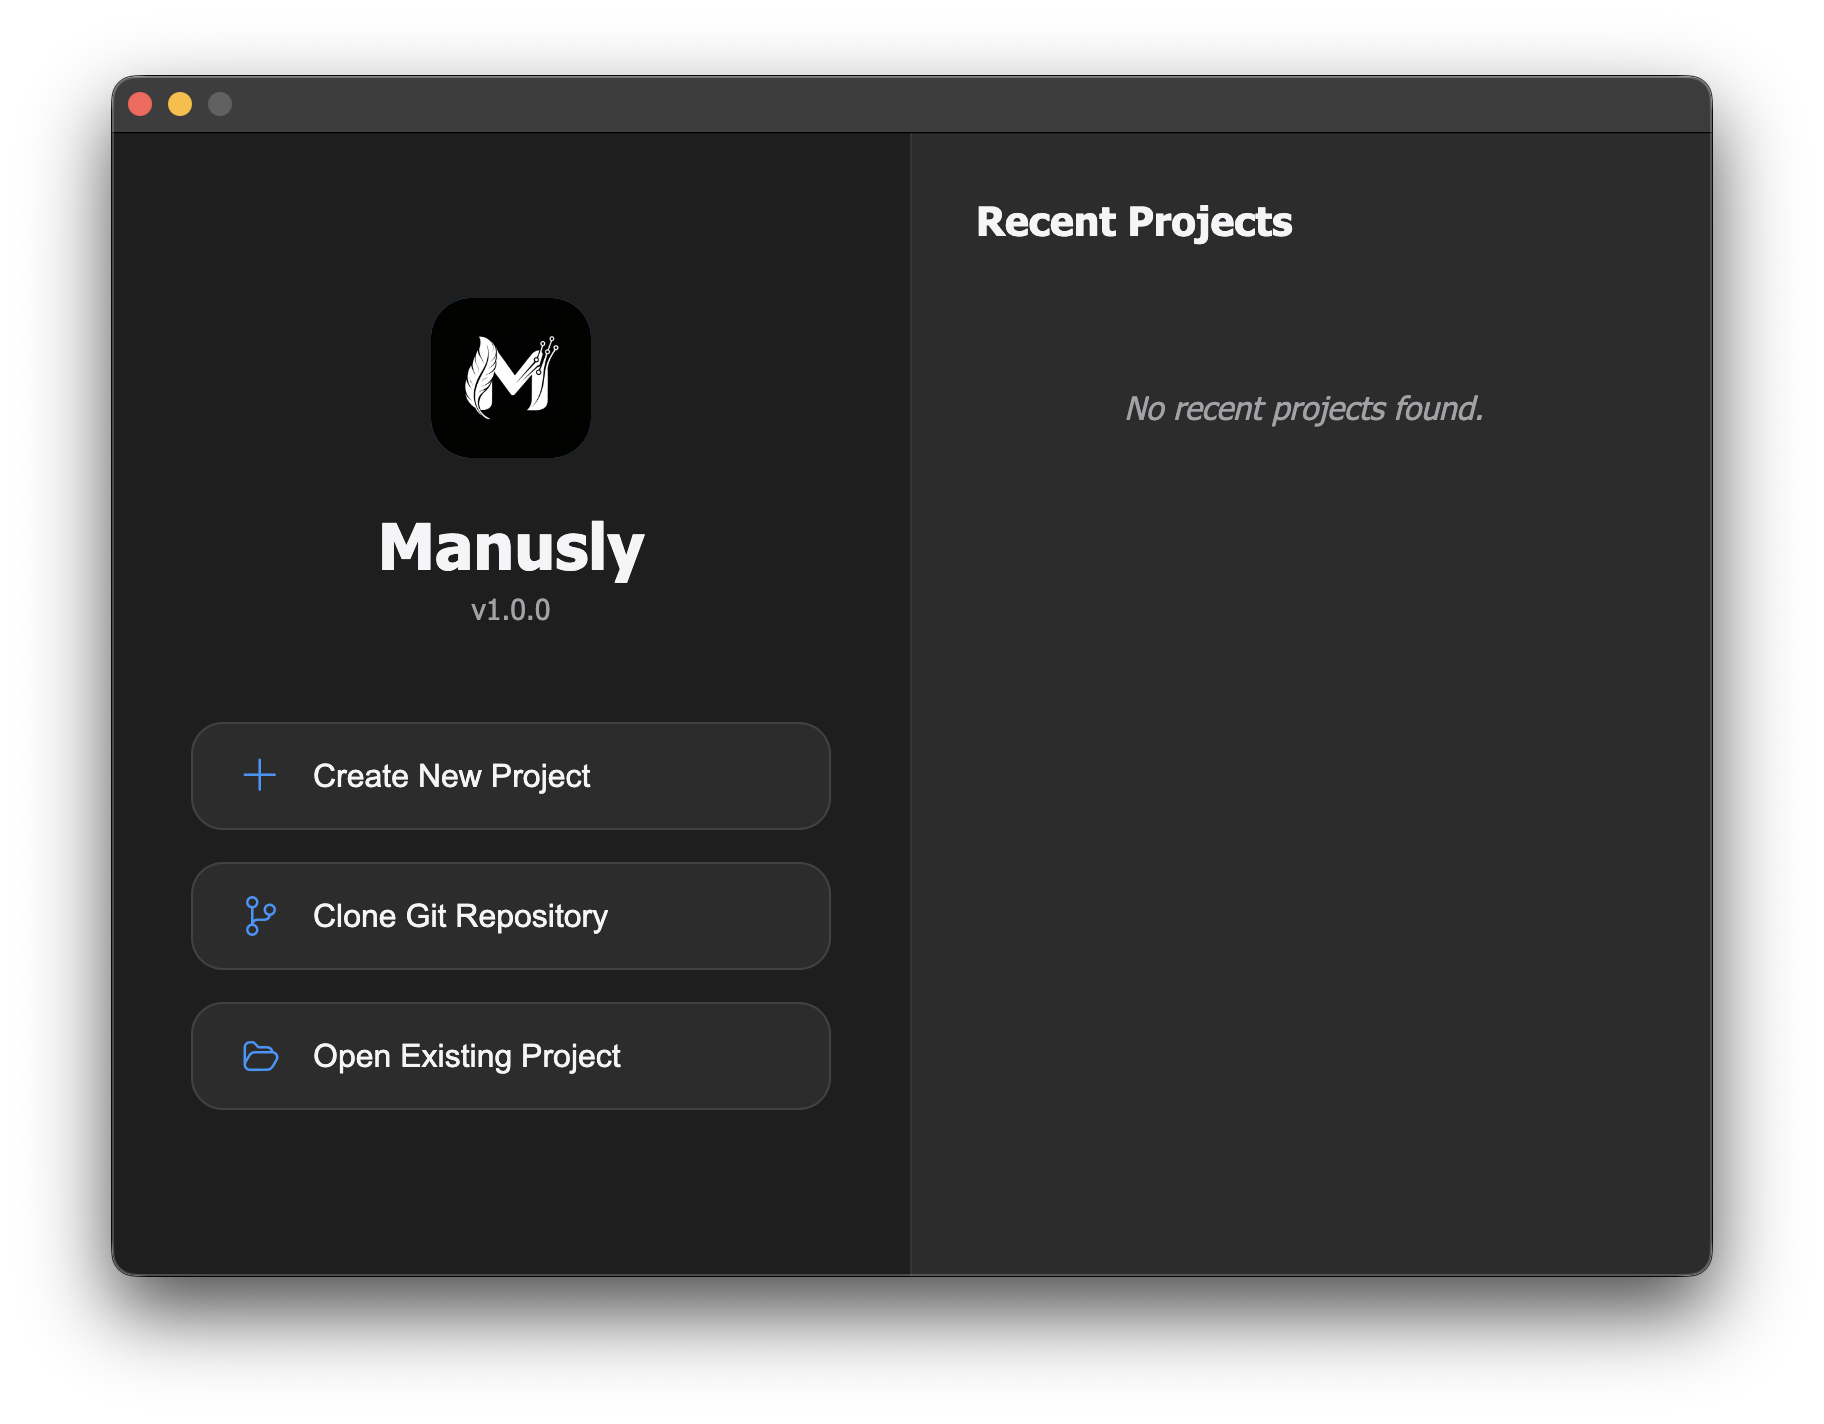
The welcome window provides quick access to start a new project, clone from Git, or open existing files.
Getting Started Options
From the welcome window, you can begin working on your LaTeX projects using any of these options:
Create New Project
Start with a blank LaTeX document. Enter a project name and Manusly will create a new project folder with a basic .tex file. This gives you a clean slate to begin writing your document.
Clone Git Repository
Clone an existing LaTeX project from a Git repository. Enter the repository URL, and optionally provide username and password/token for private repositories. Manusly will clone the project locally for you to start working.
Open Existing Project
Open a local LaTeX project from your computer. Browse your file system to select an existing project folder. Manusly will load all files and display them in the file tree for easy access.
Recent Projects
The right panel of the welcome window displays your recently opened projects, providing quick access to documents you've been working on. Each entry shows the project name, file path, and last access time. Click on any recent project to open it immediately without navigating through your file system.
Manusly automatically tracks your project history and updates the recent projects list as you work. This feature helps you maintain workflow continuity across sessions and quickly return to ongoing documents.
Main Editor Window
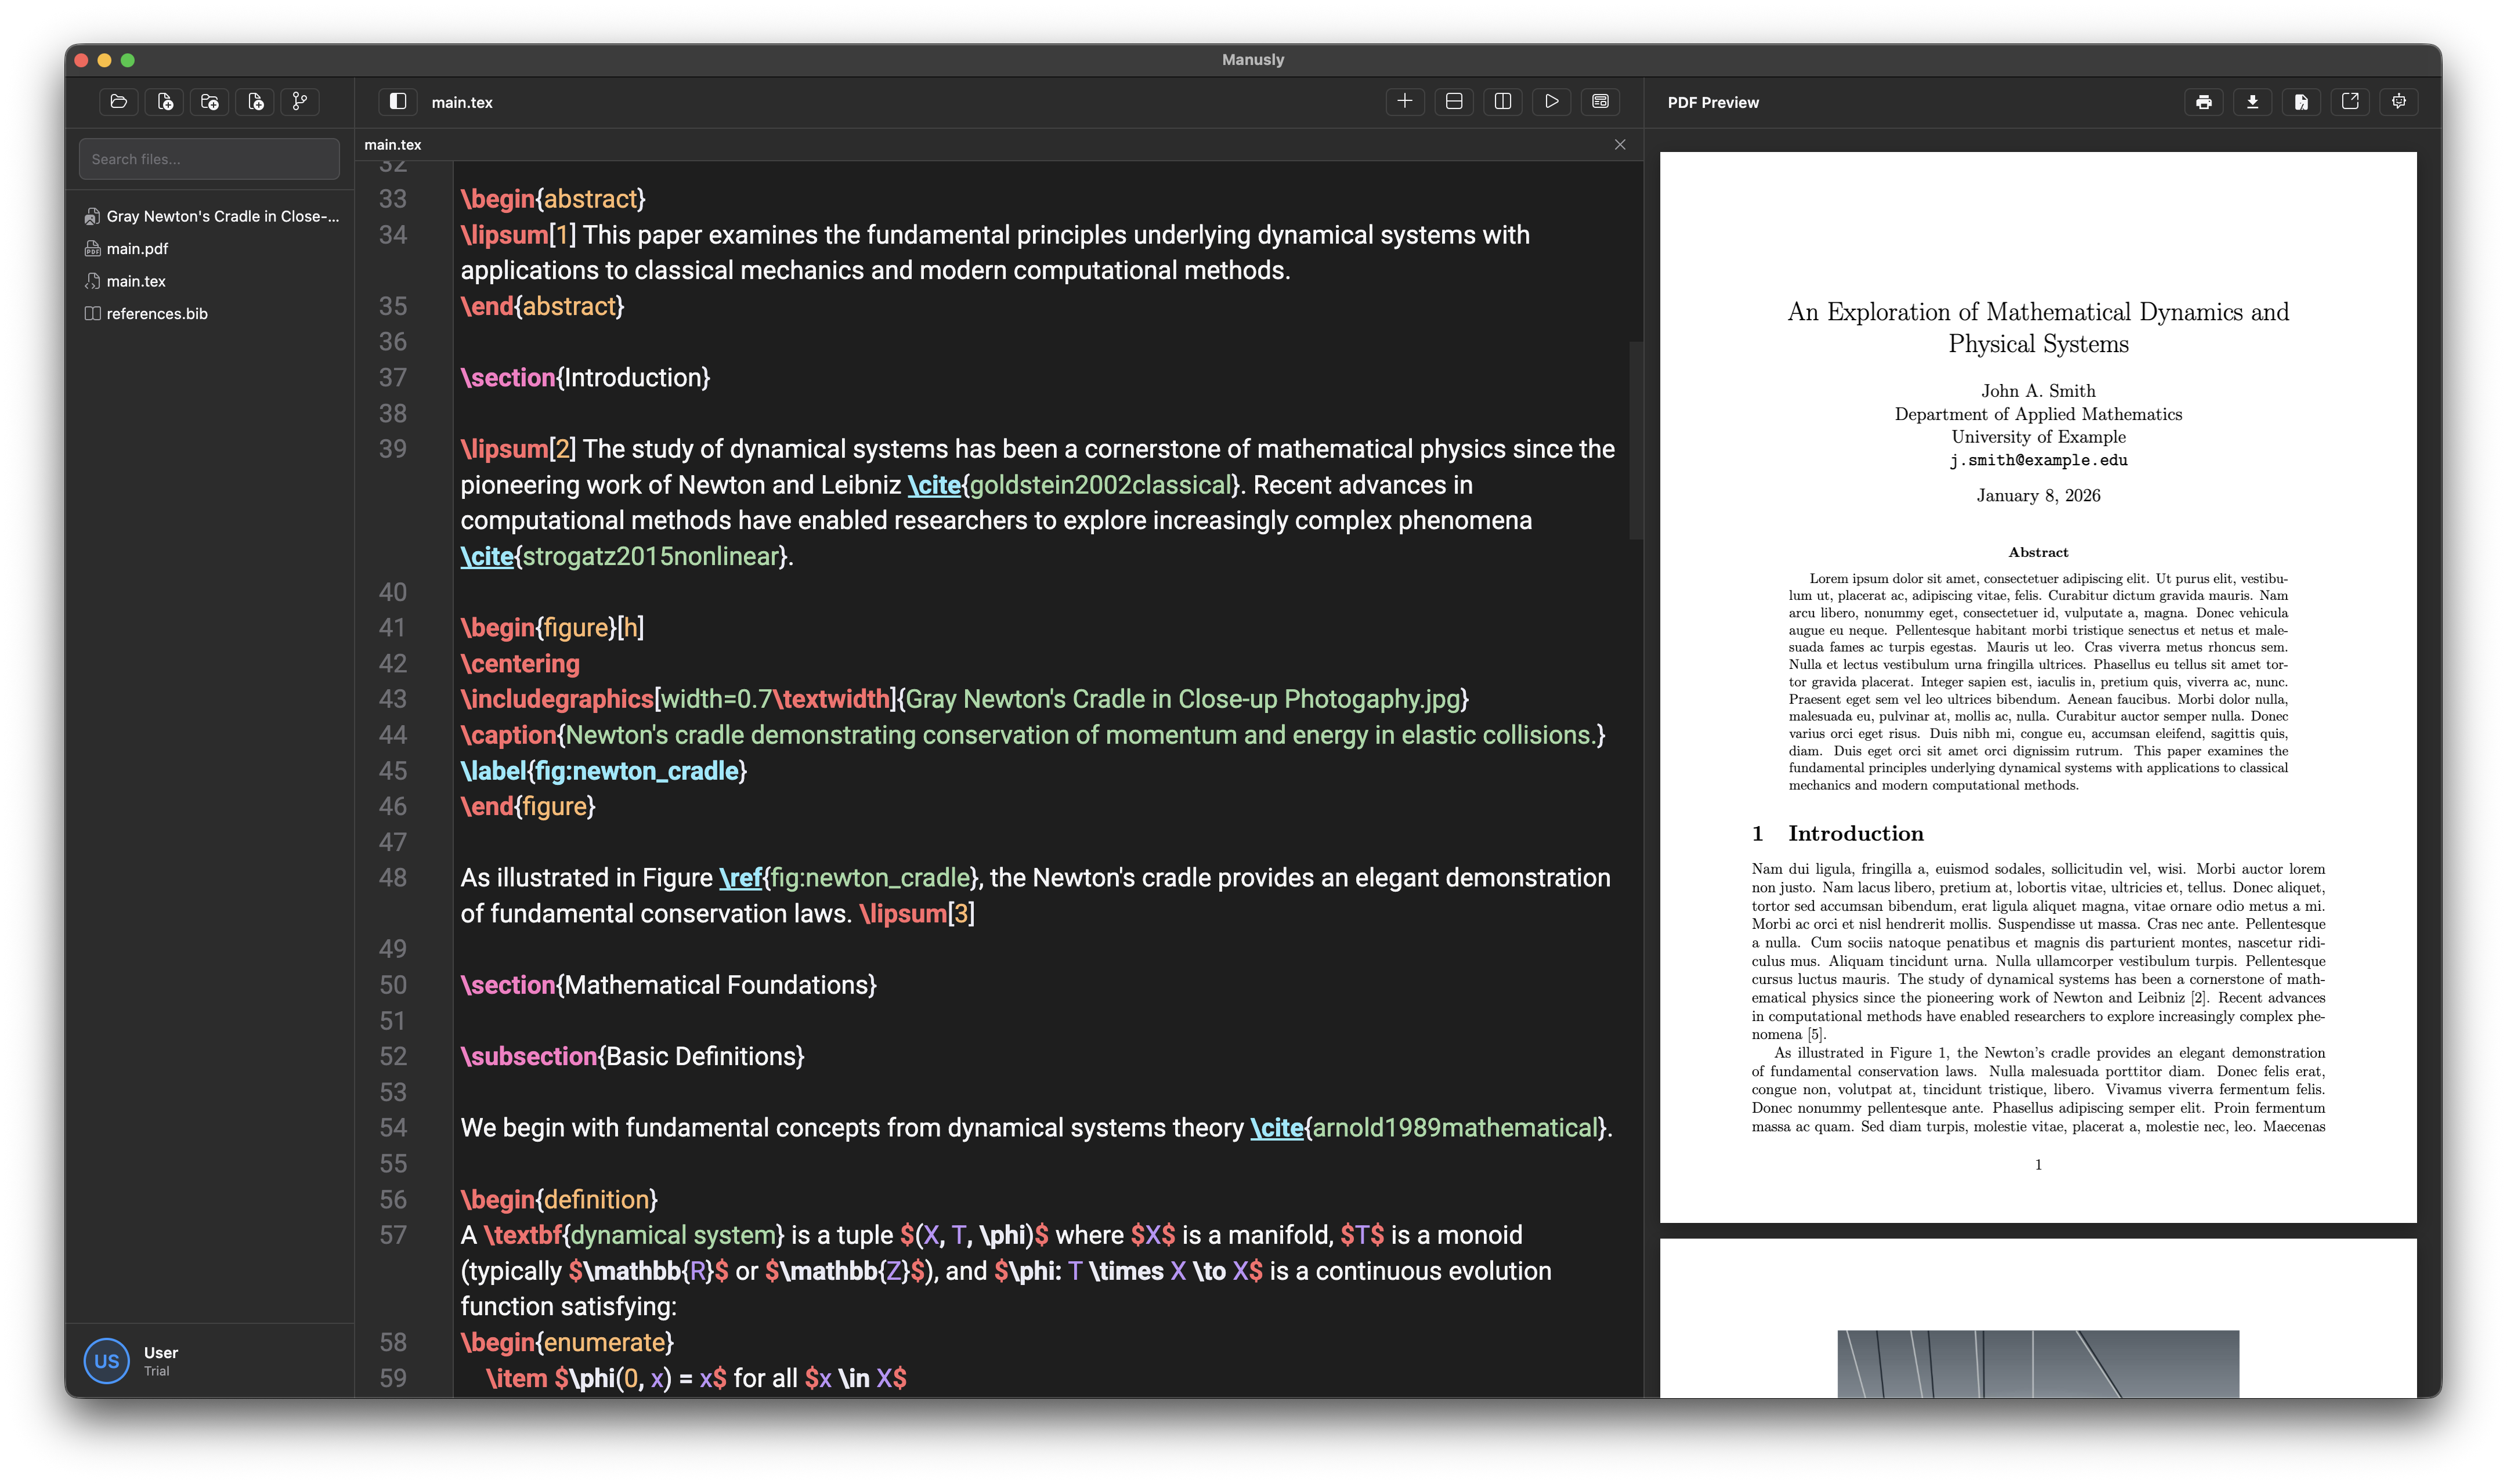
The main editor window displays your project file tree, LaTeX editor with tabs, and live PDF preview.
Project Sidebar
The left sidebar provides quick access to project management operations. The toolbar at the top includes the following actions:
New Project
Creates a new LaTeX project from scratch or template.
New Folder
Create a new folder to organize your project files.
Add Existing File
Import existing files from your computer into the project.
New File
Create new .tex, .bib, .sty, or other supporting files.
Below the toolbar, the file tree displays your project's directory structure with search functionality. Click on any file to open it in the editor. Right-click on files or folders for additional options such as rename, delete, duplicate, show in Finder, copy path, set as main file, and refresh.
Editor and PDF Preview
The center panel contains the LaTeX editor with syntax highlighting, auto-completion for commands, environments, citations, and packages. Files open in tabs at the top for easy navigation. As you type, the PDF preview on the right updates in real-time, showing you exactly how your document will appear when compiled.
The PDF preview header includes a toggle button to switch to AI Chat mode, where you can interact with an AI assistant to help write, edit, or debug your LaTeX documents.
Settings
Access Manusly settings by pressing Ctrl + , (Windows/Linux) or Cmd + , (macOS). The settings window displays your account information including your name, email, plan (Free, Pro, or Ultra), and expiration date. It also provides comprehensive configuration options for all Manusly features through a tabbed interface.
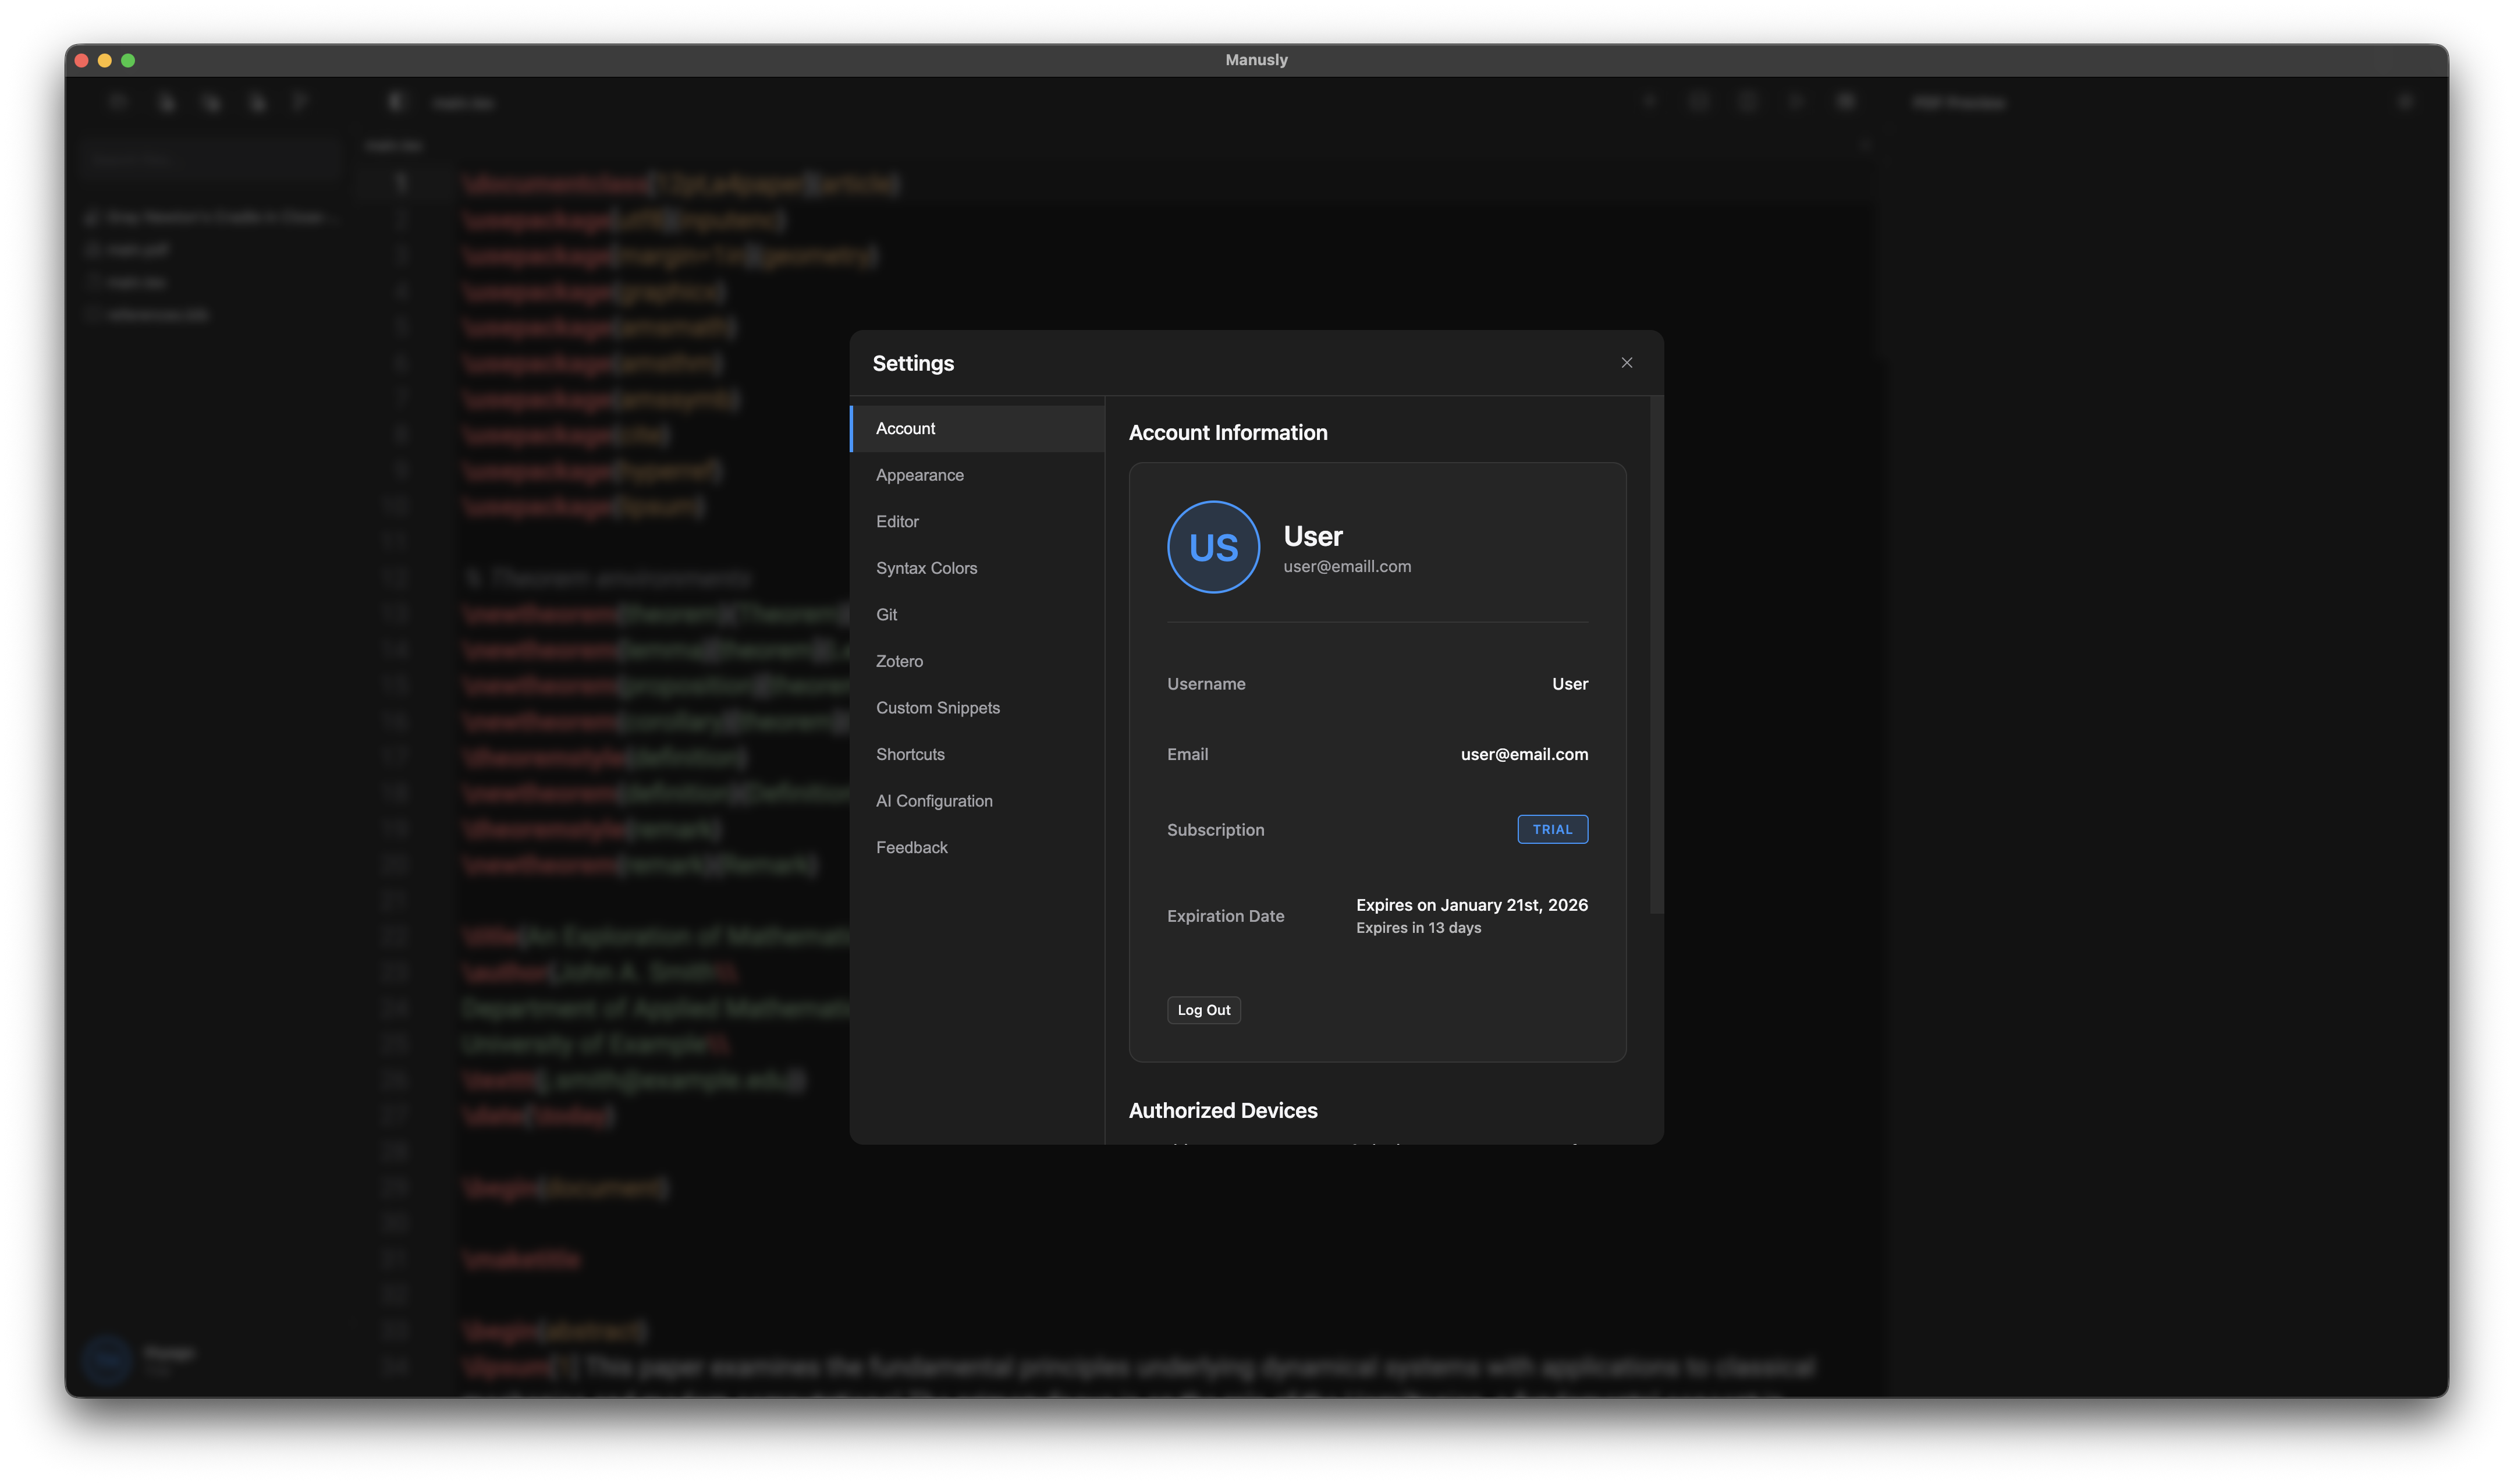
The settings window with tabs for account, appearance, editor, syntax colors, Git, Zotero, custom snippets, keyboard shortcuts, AI configuration, and feedback.
| Tab | Description |
|---|---|
| Account | View username, email, subscription plan, expiration date, and authorized devices |
| Appearance | Customize display language, theme (Dark/Light/System), editor font, font size, and line height |
| Editor | Configure tab size, autocorrect (contractions, smart quotes, symbols), spell check language, and user dictionary. Supported spell-check languages include English, Spanish, French, German, and Portuguese (Brazil). |
| Syntax Colors | Customize LaTeX syntax highlighting colors for keywords, numbers, strings, comments, and more |
| Git | Configure Git identity (name and email), SSH key generation, and configuration scope |
| Zotero | Connect to Zotero Web API or Better BibTeX, configure auto-sync intervals and collections |
| Custom Snippets | Create and manage custom LaTeX snippets for autocompletion with placeholders |
| Keyboard Shortcuts | View, search, and customize keyboard shortcuts for file operations, view, LaTeX, and AI actions |
| AI Configuration | Choose AI providers for chat and ghost text (Manusly Cloud or Offline Model), manage cloud usage, and buy credit top-ups |
| Feedback | Submit technical issues, feature suggestions, problem reports, or general feedback |
AI Configuration
Manusly supports two AI provider modes: Manusly Cloud and Offline Model. You can configure both in one place.
Manusly Cloud
Manusly Cloud is the managed AI provider for chat and writing suggestions. It does not require third-party API keys in the app UI.
- Open Settings → AI Configuration
- Set Chat Provider to Manusly Cloud
- Set Writing Suggestions Provider to Manusly Cloud
- Optionally enable Offline fallback
Offline Models
Offline models run locally for privacy-first workflows. Performance depends on your hardware, and because offline models are much smaller than Manusly Cloud models, they usually do not match Manusly Cloud in quality. You can choose offline providers for chat, writing suggestions, or both.
- Open Settings → AI Configuration
- Install the offline Chat and/or Suggestions models
- Select Offline Model for chat and/or suggestions
- Use the same panel to monitor download progress or remove models
Credits & Billing
Manusly Cloud usage is budget-based. Paid plans include monthly AI budget, and you can buy one-time credit top-up packs from the AI Configuration panel.
- Current total budget status (%)
- Plan budget vs top-up budget split
- Recent cloud usage events and status
- Credit pack purchases through secure checkout
For invoices and payment records, open Settings → Billing.
If you want the best quality, use Manusly Cloud. If you need full local privacy, install and use Offline Models.
Release v1.0.0
Current Stable Release
What's New
- Professional LaTeX editor with comprehensive syntax highlighting
- PDF preview panel
- Dark and light themes with system theme detection
- AI-powered features: writing suggestions to help when you're stuck, AI chat assistance, and AI-powered autocorrect
- Custom snippet support for personalized code snippets
- Git integration for version control of your LaTeX projects
- Zotero integration for seamless citation management
- Spell checking for English, Spanish, French, German, and Portuguese (Brazil)
- Multiple projects support - work on several projects simultaneously
- Multi-language support: English, German, Spanish, French, and Portuguese
- Authentication via Google, GitHub, or email
- AI provider model selection: Manusly Cloud and Offline Model
- Cross-platform: Windows, macOS, and Linux
- Pandoc integration for document conversion (DOCX, etc.)
- Automatic LaTeX compiler detection (TeX Live, MacTeX, MiKTeX)
Git Tutorial
Git is a distributed version control system that helps you track changes in your files and collaborate with others. Manusly includes built-in Git integration, allowing you to manage your LaTeX projects without leaving the editor.
Installing Git
Before using Git in Manusly, you'll need to install Git on your system. Follow the instructions for your operating system below.
macOS Installation
The easiest way to install Git on macOS is through Xcode Command Line Tools. Most modern Macs have these tools installed by default.
Method 1: Using Terminal (Recommended)
Open Terminal from Applications → Utilities and run:
git --version
If Git is not installed, you'll be prompted to install Xcode Command Line Tools. Click "Install" to proceed.
Method 2: Using Homebrew
If you have Homebrew installed, you can install Git using:
brew install git
Method 3: Downloading Installer
Download the official installer from git-scm.com. Open the downloaded .pkg file and follow the installation wizard.
After installation, verify Git is working by opening Terminal and running:
git --version
You should see output similar to: git version 2.39.0
Windows Installation
On Windows, Git is commonly installed using the official installer or through package managers like Chocolatey or Winget.
Method 1: Official Installer (Recommended)
Download the Windows installer from git-scm.com. The installer will download automatically when you visit the page.
Run the installer and follow these key configuration steps:
- Select Components: Keep the default options, but ensure "Git Bash Here" is checked
- Choosing the default editor: Select your preferred text editor (VS Code is recommended)
- Adjusting the name of the initial branch: Select "Let Git decide" or customize as needed
- Adjusting your PATH environment: Select "Git from the command line and also from 3rd-party software"
- Choosing HTTPS transport: Use the OpenSSL library
- Configuring the line ending conversions: Select "Checkout Windows-style, commit Unix-style line endings"
- Configuring the terminal emulator: Use MinTTY or Windows' default console
- Choose the default behavior of `git pull`: Merge or rebase based on your preference
Method 2: Using Winget
If you have Windows Package Manager (winget) installed, run:
winget install --id Git.Git -e --source winget
Method 3: Using Chocolatey
If you have Chocolatey installed, run:
choco install git
Open Command Prompt or PowerShell and run:
git --version
You should see output similar to: git version 2.39.0.windows.2
Linux Installation
Git is available through most Linux package managers. The commands below cover the most common distributions.
Debian/Ubuntu
Update your package index and install Git:
sudo apt update
sudo apt install git
Fedora
sudo dnf install git
CentOS/RHEL
sudo yum install git
Arch Linux
sudo pacman -S git
openSUSE
sudo zypper install git
Open a terminal and run:
git --version
You should see output similar to: git version 2.39.0
Configuring Git
After installing Git, configure your identity. This information will be included in your commits.
git config --global user.name "Your Name"
git config --global user.email "your.email@example.com"
Next Steps
Now that Git is installed, you can start using it in Manusly:
- Open Manusly and go to Settings → Git to configure your Git identity
- Create a new project with Git initialization or clone an existing repository
- Use the Git panel to stage, commit, push, and pull changes
- Manage branches and resolve merge conflicts directly in Manusly
To learn more about Git, visit the official Git documentation or try the Learn Git Branching interactive tutorial.
LaTeX Installation Guide
LaTeX is a typesetting system used to create professional-looking documents, papers, and reports. Manusly requires a LaTeX distribution to compile your .tex files into PDFs. This guide covers installation on macOS, Windows, and Linux.
Choosing a LaTeX Distribution
Several LaTeX distributions are available, each with different features and package selection:
- TeX Live: The most comprehensive and widely-used distribution. Available on all major platforms.
- MacTeX: A TeX Live distribution specifically packaged for macOS with additional Mac applications.
- MiKTeX: A smaller distribution that downloads packages on-demand during compilation.
For most users, we recommend MacTeX (macOS), TeX Live (Linux), or MiKTeX (Windows) as they are well-maintained and compatible with Manusly.
macOS Installation
On macOS, you can install LaTeX using MacTeX (full distribution) or BasicTeX (minimal installation).
Option 1: MacTeX (Full Distribution)
MacTeX is the complete TeX Live distribution for macOS, including additional applications like TeXShop and BibDesk.
- Download MacTeX from tug.org/mactex
- Choose the appropriate version for your Mac (Intel or Apple Silicon)
- Open the downloaded .pkg file
- Follow the installation wizard (installation requires ~6GB of disk space)
- Restart Manusly after installation if it was running
Option 2: BasicTeX (Minimal Installation)
BasicTeX is a smaller alternative (~100MB) that downloads packages as needed. Recommended if disk space is limited.
- Download BasicTeX from tug.org/mactex/mactex-download.html
- Open the downloaded .pkg file and follow the installation wizard
- After installation, you may need to install additional packages manually as you use them
Option 3: Using Homebrew
If you have Homebrew installed, you can install BasicTeX via the command line:
brew install --cask basictex
MacTeX-2025 requires macOS 10.14 (Mojave) or higher. It runs natively on both Intel and Apple Silicon processors.
Windows Installation
On Windows, you can use TeX Live or MiKTeX. TeX Live provides a comprehensive installation, while MiKTeX is smaller and downloads packages on demand.
Option 1: MiKTeX (Recommended for Windows)
MiKTeX is a modern TeX distribution for Windows with on-demand package installation.
- Download the MiKTeX installer from miktex.org/download
- Run the downloaded .exe installer
- Choose your preferred installation directory
- Select "Install missing packages on-the-fly" to automatically download packages when needed
- Complete the installation and restart Manusly if it was running
Option 2: TeX Live
TeX Live is the comprehensive cross-platform distribution.
- Download the TeX Live installer from tug.org/texlive
- Download the ISO image or use the network installer
- Extract the files and run
install-tl-windows.batas administrator - Follow the installation wizard (installation may take 10-20 minutes)
- Restart your computer after installation completes
During installation, Windows Defender may show a warning. Click "More info" and "Run anyway" to proceed with the installation.
Linux Installation
On Linux, TeX Live is available through most package managers. The installation method depends on your distribution.
Debian/Ubuntu
Install the full TeX Live distribution:
sudo apt update
sudo apt install texlive-full
For a minimal installation, use texlive-base instead of texlive-full.
Fedora/RHEL/CentOS
sudo dnf install texlive-scheme-full
Arch Linux
sudo pacman -S texlive-most
openSUSE
sudo zypper install texlive-packages
The full TeX Live installation requires 4-7GB of disk space. If space is limited, install only the base packages and add additional packages as needed using your package manager.
Verifying Your Installation
After installation, verify that LaTeX is working correctly by checking the version:
pdflatex --version
You should see output similar to:
pdfTeX 3.141592653-2.6-1.40.25 (TeX Live 2025)
Configuring Manusly
Manusly should automatically detect your LaTeX installation. If compilation fails:
- Ensure LaTeX is installed and working (run
pdflatex --versionin your terminal) - Restart Manusly after installing LaTeX
- Check that the correct main .tex file is set (right-click on the main file in the sidebar and select "Set as main file")
- If using BasicTeX or MiKTeX, ensure missing packages are installed when prompted
Troubleshooting
"File not found" Errors
If Manusly cannot find pdflatex, the LaTeX distribution may not be in your system PATH. Try restarting your terminal and computer, or add the LaTeX binary directory to your PATH:
- macOS: Usually
/usr/local/texlive/2025/bin/universal-darwin/ - Windows: Usually
C:\texlive\2025\bin\windows\ - Linux: Usually
/usr/local/texlive/2025/bin/x86_64-linux/
Missing Package Errors
If you get errors about missing packages (e.g., "File 'xxx.sty' not found"):
- TeX Live (Linux): Use
tlmgr install package-name - MiKTeX (Windows): The package should install automatically if "Install missing packages on-the-fly" is enabled
- macOS: Use the TeX Live Utility application or run
tlmgr install package-namein Terminal
For more information, visit the LaTeX Project Help page or browse the TeX Stack Exchange community.
GitHub Setup Guide
GitHub is a cloud-based platform for hosting Git repositories, enabling collaboration with developers worldwide. This guide will help you create a GitHub account, set up SSH authentication, and connect your repositories using Manusly.
Creating a GitHub Account
If you don't already have a GitHub account, follow these steps to create one:
Step 1: Sign Up
Visit github.com and click "Sign up" in the top right corner.
Step 2: Enter Your Details
- Email: Enter a valid email address that you use regularly
- Password: Create a strong password (at least 15 characters, or 8 with numbers and lowercase letters)
- Username: Choose a unique username that will identify you on GitHub
Step 3: Verify Your Account
Complete the human verification puzzle and verify your email address by clicking the link GitHub sends to your email.
Step 4: Configure Your Preferences
Choose your preferences for product announcements and recommendations, then click "Continue".
GitHub Free provides unlimited public and private repositories with limited features. GitHub Pro adds advanced tools like protected branches and required reviewers. Start with Free and upgrade as needed.
Setting Up SSH Authentication
SSH keys provide a secure way to connect to GitHub without entering your username and password each time. Manusly includes a built-in SSH key generator, making setup easy.
Step 1: Configure Git Identity in Manusly
Before generating an SSH key, configure your Git identity in Manusly:
- Open Manusly and go to Settings (press
Ctrl + ,orCmd + ,) - Click on the Git tab
- In the Identity section, enter your Name and Email
- Select the configuration scope (Global is recommended)
- Click Save or the checkmark button to apply changes
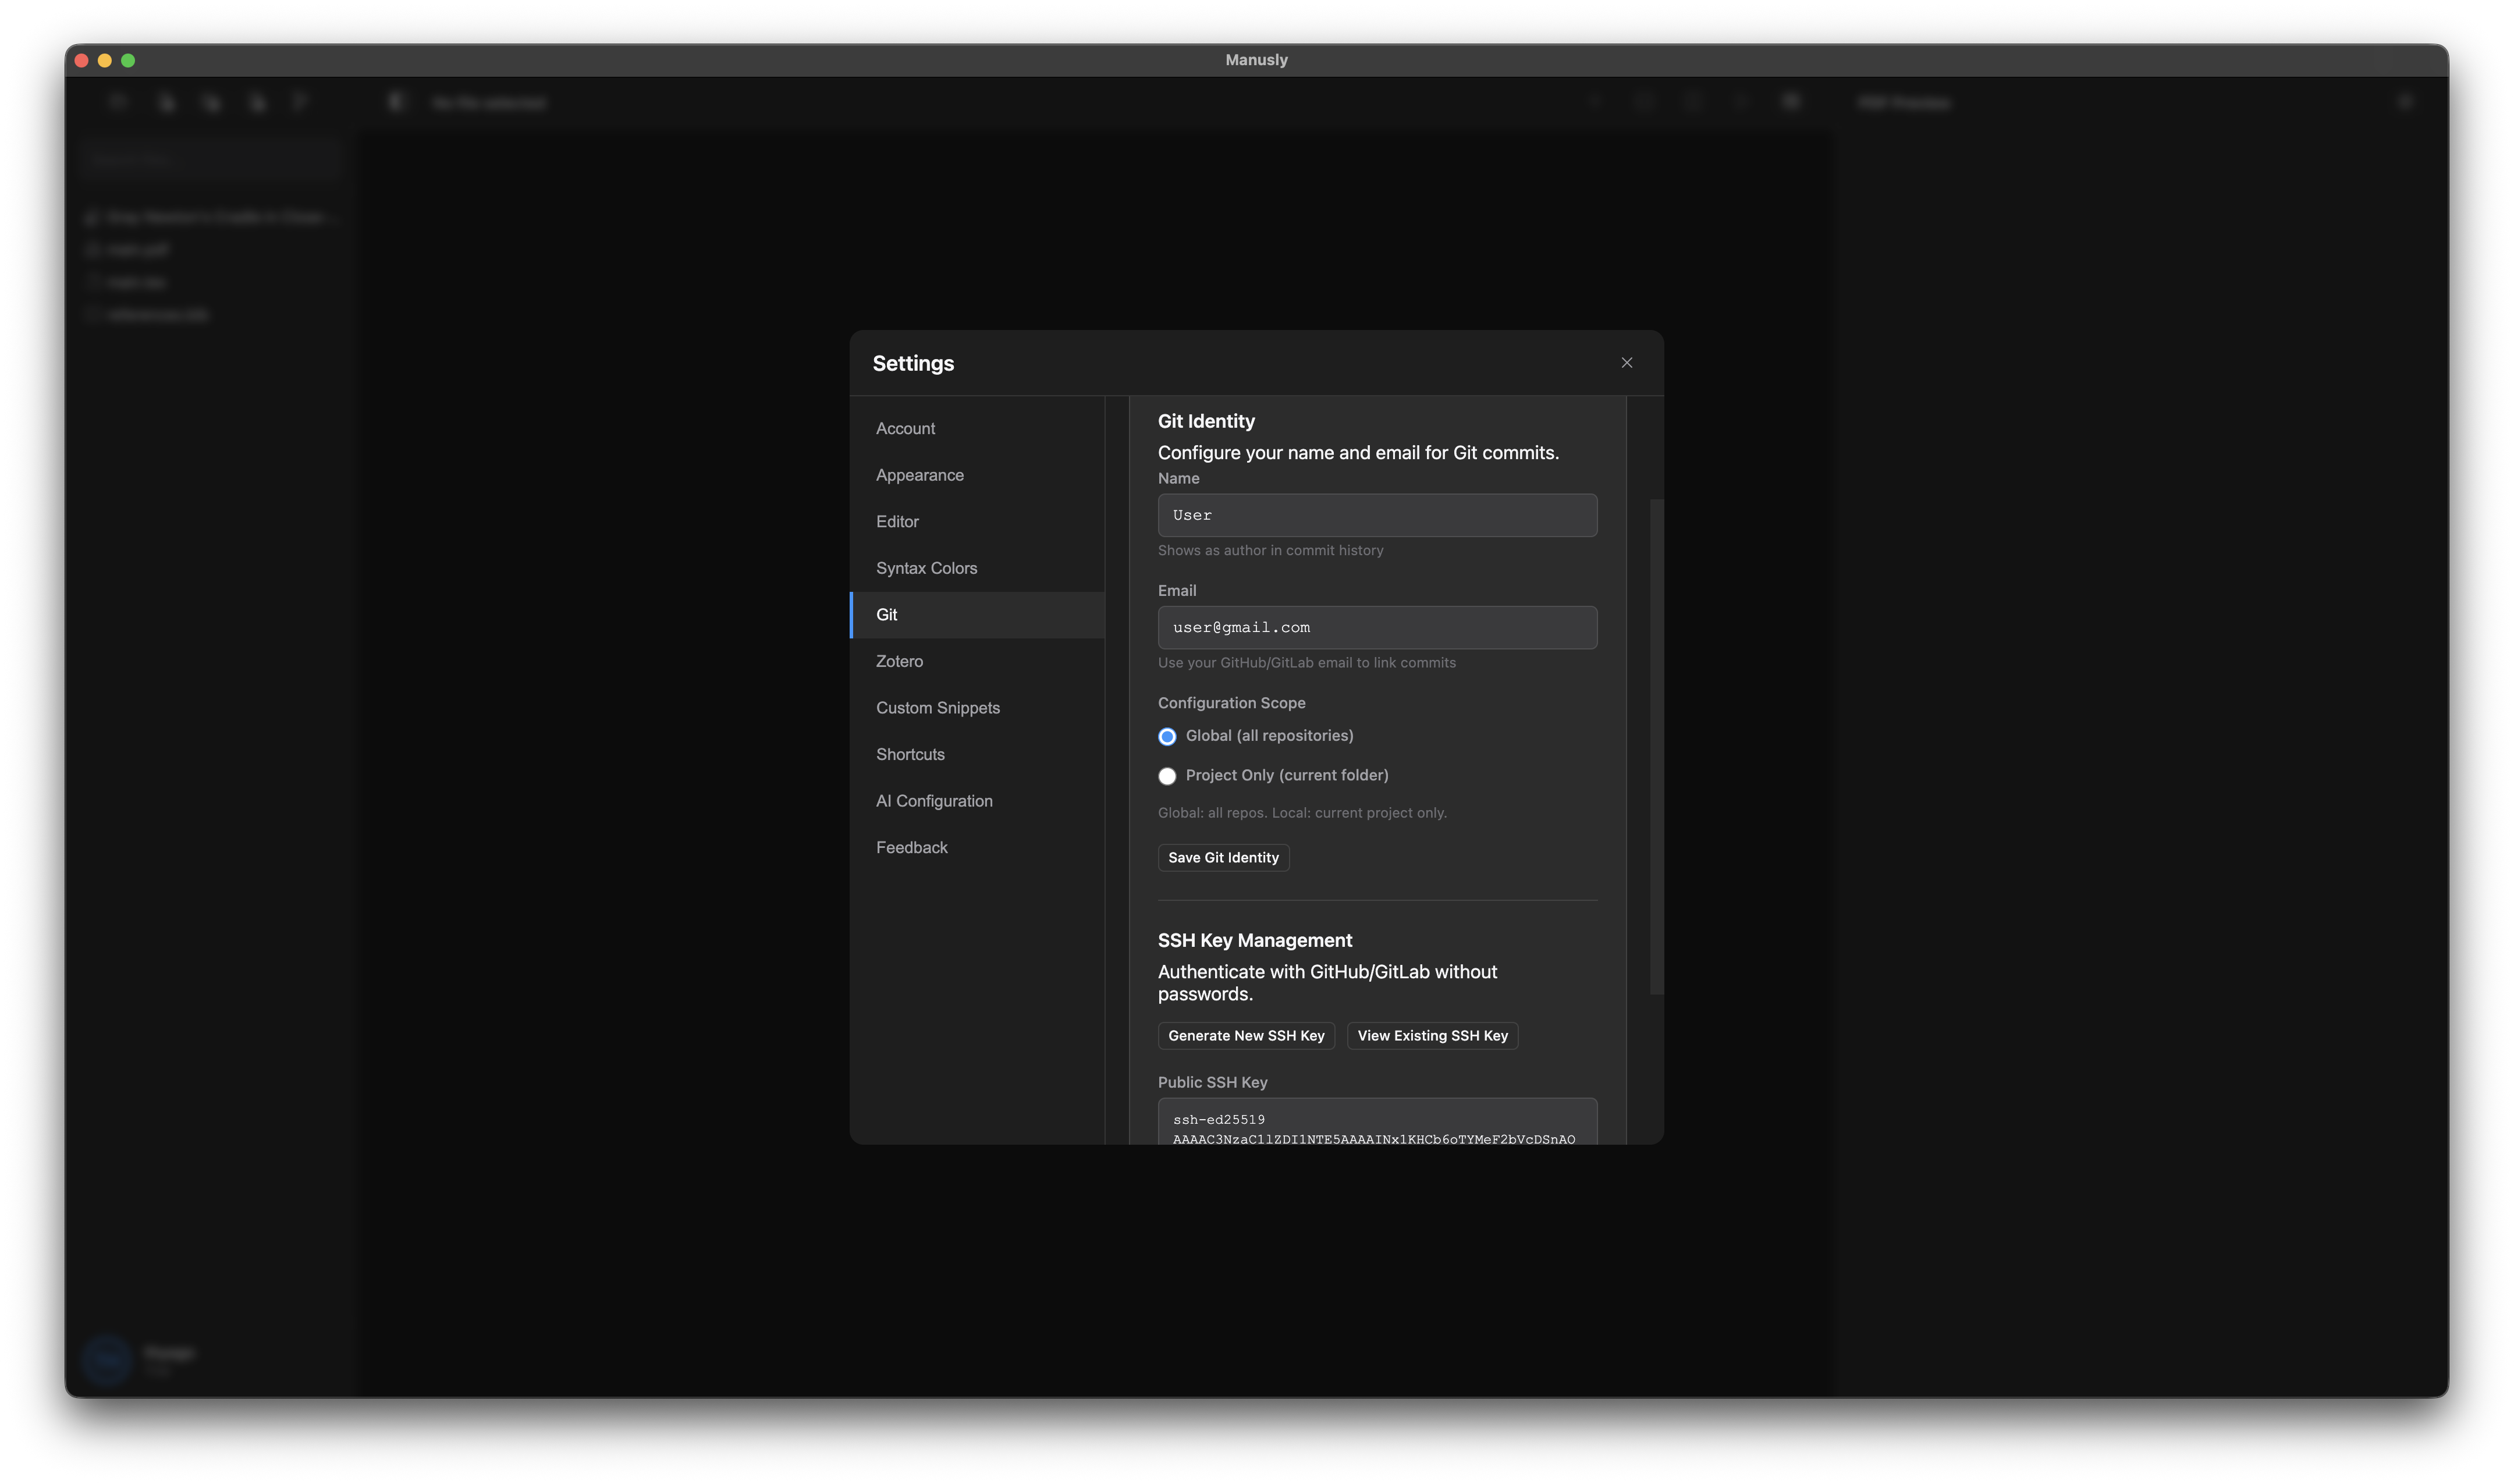
The Git panel in Manusly for managing version control
Step 2: Generate SSH Key in Manusly
Manusly can generate SSH keys for you without using the command line:
- In the Settings → Git tab, scroll to the SSH Key section
- Click the button "Generate a new SSH key"
- A dialog will appear asking for a key name. Enter a descriptive name (e.g., "Manusly-MyMacBook")
- Click "Generate" to create your SSH key pair
- Once generated, your public key will be displayed with options to "Copy Public Key" or "Delete"
Manusly generates Ed25519 keys by default, which are modern, secure, and widely supported. If you need RSA keys for compatibility with older systems, you may need to generate them manually using the terminal.
Step 3: Add SSH Key to GitHub
Now add your public key to your GitHub account:
- Copy your public key by clicking "Copy Public Key" in Manusly's Git settings
- Go to github.com and sign in to your account
- Click your profile picture in the top right corner and select "Settings"
- In the left sidebar, click "SSH and GPG keys"
- Click the green "New SSH key" button
- Enter a Title (e.g., "Manusly - My MacBook")
- Select "Authentication key" from the Key type dropdown
- Paste your public key into the "Key" field
- Click "Add SSH key"
Never share your private key with anyone. Only paste the public key (starts with ssh-ed25519 or ssh-rsa) on GitHub. Your private key stays safely on your machine.
Step 4: Verify the Connection
Test that your SSH connection is working:
- Open Settings → Git in Manusly
- Your SSH key should show in the list with a fingerprint
- Try cloning a repository using SSH (see next section)
Cloning a Repository with SSH
Once your SSH key is set up, you can clone repositories using SSH URLs without entering credentials.
Step 1: Copy the SSH URL from GitHub
On GitHub, navigate to the repository you want to clone:
- Go to the main page of the repository on GitHub
- Click the green "Code" button
- In the "Clone" section, select "SSH"
- Copy the URL shown (it will look like:
git@github.com:username/repository.git)
The welcome window showing the Clone Git Repository option
Step 2: Clone in Manusly
Clone the repository using Manusly:
- Open Manusly
- In the welcome window, click "Clone Git Repository"
- Paste the SSH URL into the URL field
- Choose a local directory where to save the repository
- Click "Clone"
When connecting to GitHub via SSH for the first time, you may see a host key verification prompt. Type yes and press Enter to accept the GitHub host key.
Using the Git Panel in Manusly
Once your repository is open, use the Git panel to manage your work:
Making Changes
- Edit your LaTeX files as normal
- The Git panel shows all modified files
- Files are separated into "Staged" and "Unstaged" sections
- Click the checkbox next to a file to stage it
- Review your changes by clicking on the file name
Committing Changes
- Stage the files you want to commit
- Enter a descriptive commit message in the text field
- Click "Commit" to save your changes
- Commits are stored locally until you push them
Pushing and Pulling
- Click "Push" to upload your commits to GitHub
- Click "Pull" to download changes from GitHub
- The status bar shows pending commits (e.g., "3 commits to push")
Managing Branches
The Branches tab allows you to:
- View all branches in your repository
- Switch to a different branch by clicking on it
- Create new branches for feature work
- Merge branches when ready
Resolving Merge Conflicts
When multiple people work on the same file, conflicts can occur. Manusly provides a built-in conflict resolution tool:
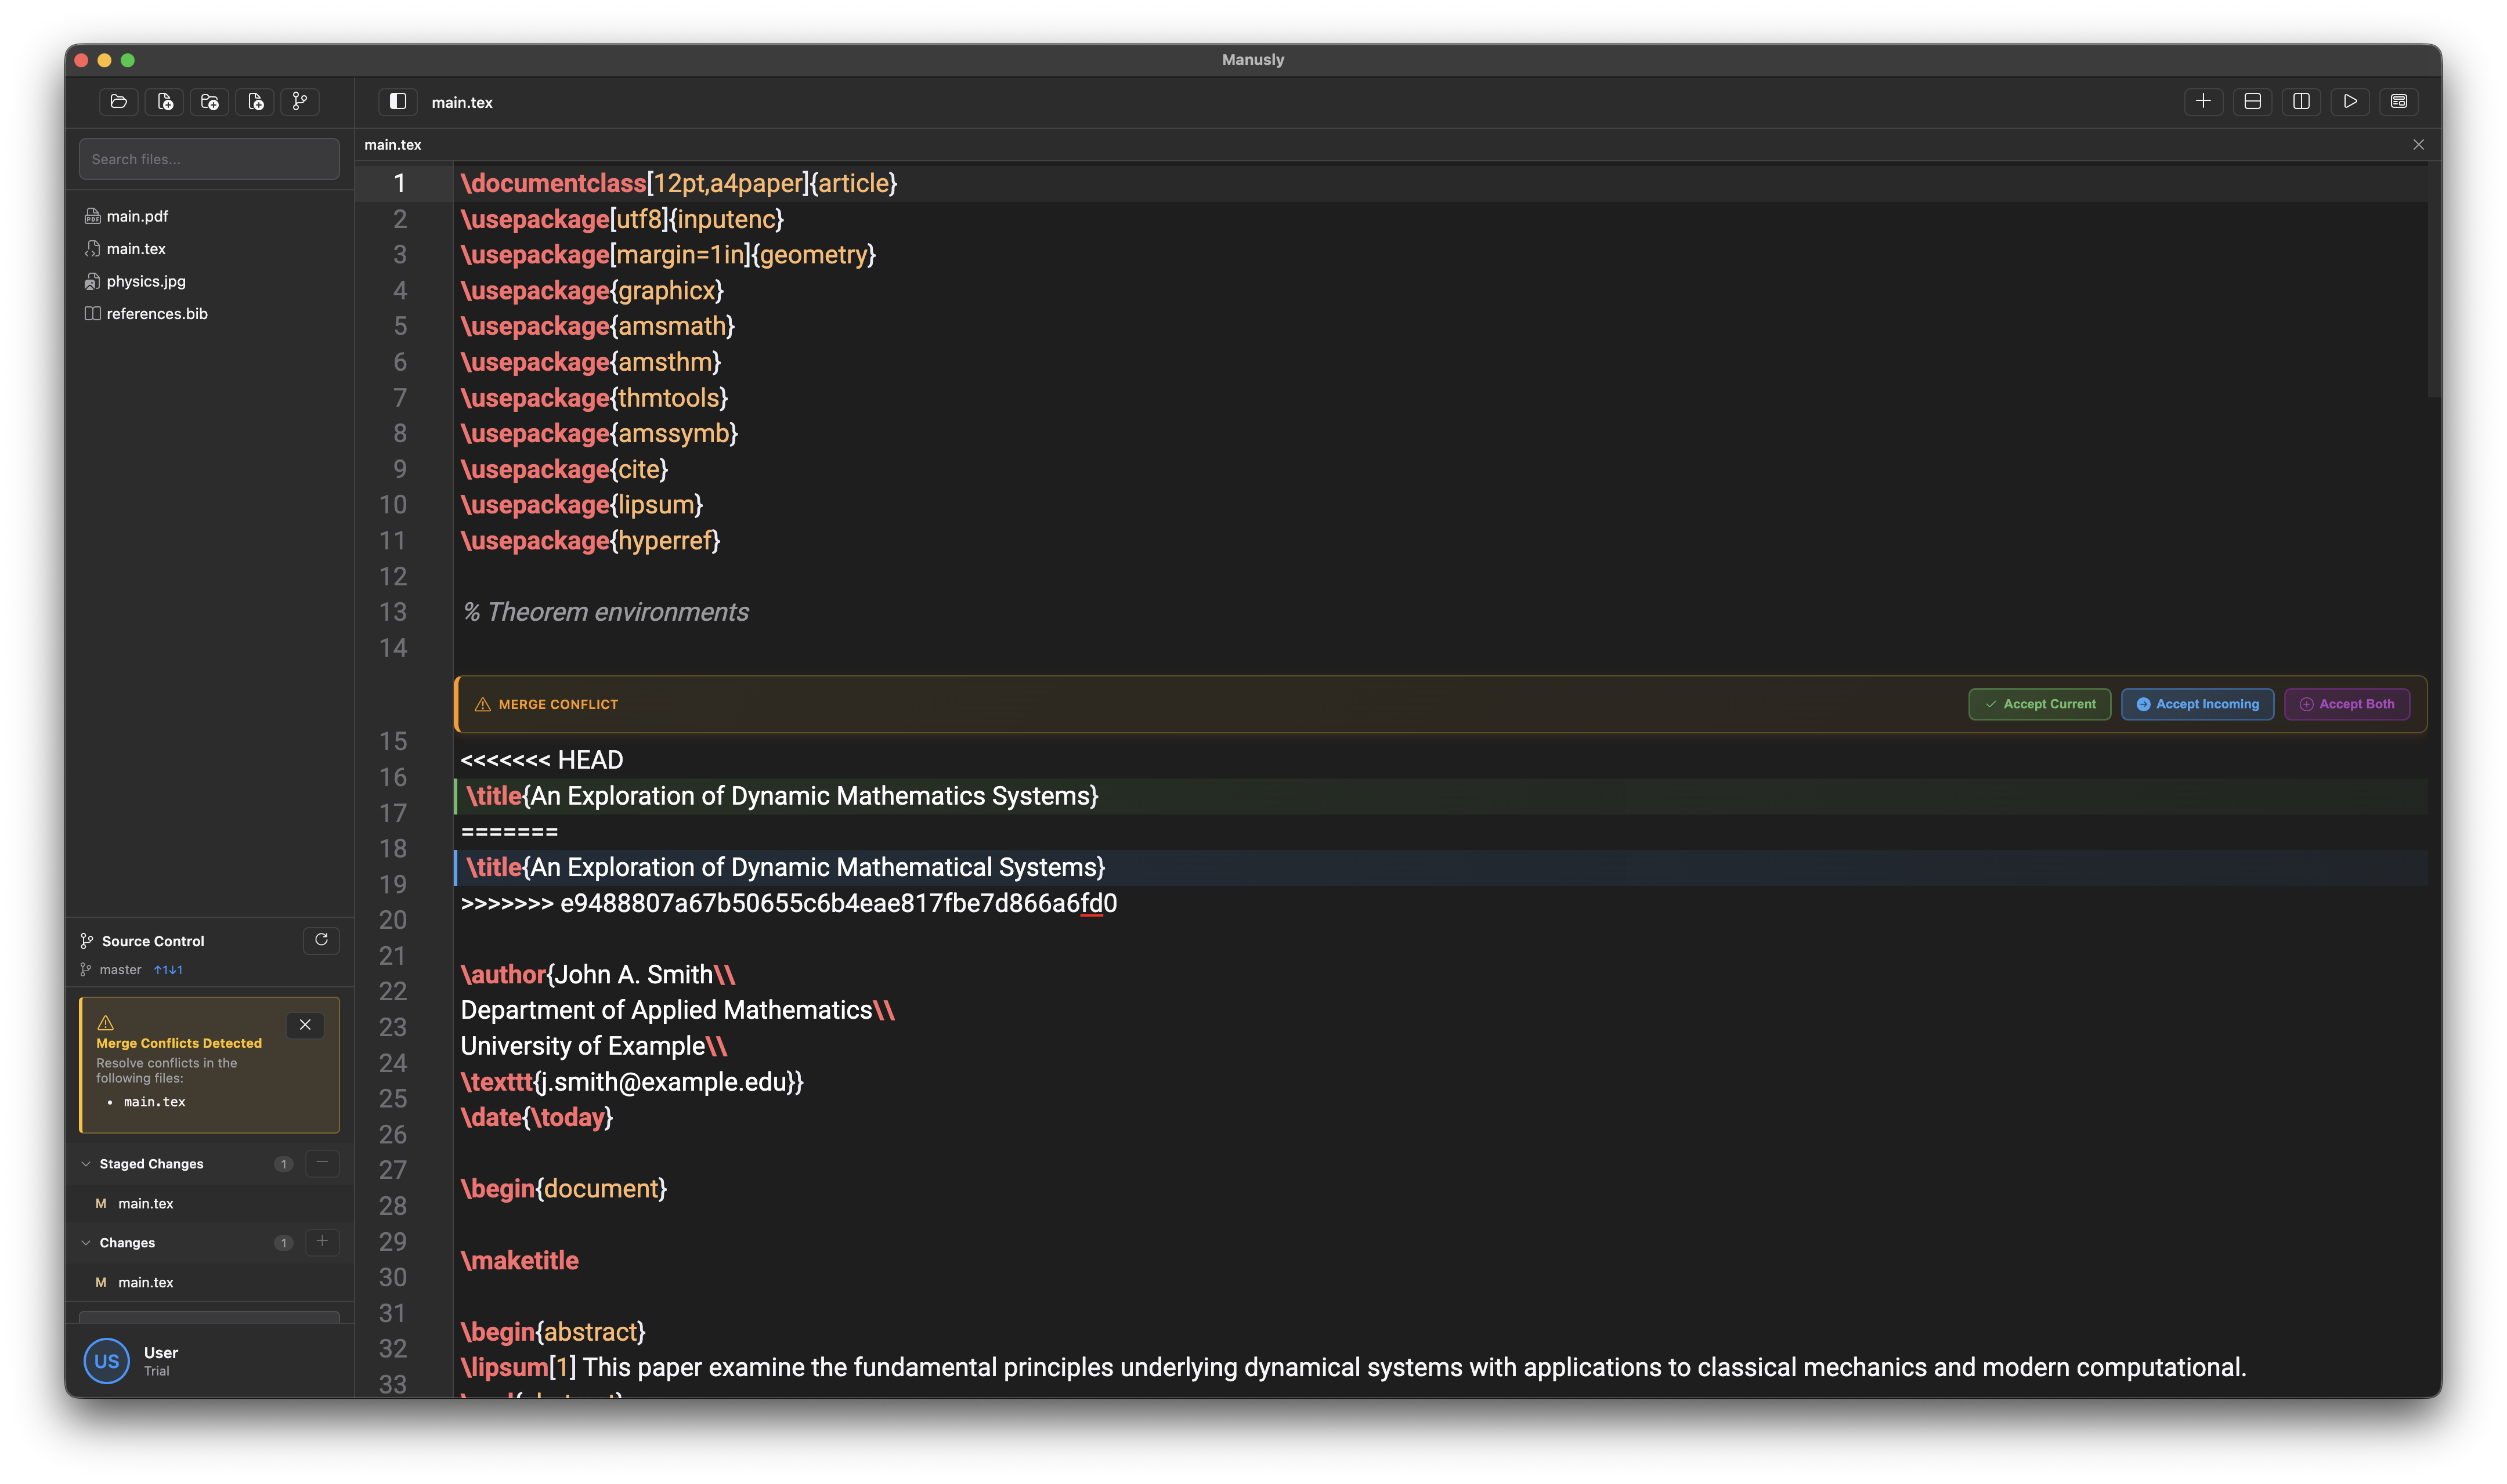
The merge conflict resolution interface in Manusly
To resolve merge conflicts in Manusly:
- When a conflict is detected, click on the conflicted file in the Git panel
- The conflict resolution window will show conflicting lines highlighted
- Choose to "Accept Current" (your changes), "Accept Incoming" (their changes), or "Accept Both"
- Alternatively, manually edit the file to keep the desired changes
- Stage the resolved file and commit to complete the merge
Before starting work, always pull the latest changes from the remote repository to minimize conflicts. Communicate with your team to avoid working on the same files simultaneously.
Troubleshooting
Permission Denied Errors
If you see "Permission denied" errors when pushing or pulling:
- Verify your SSH key is added to GitHub (Settings → SSH and GPG keys)
- Check that you're using the SSH URL (not HTTPS)
- Ensure your SSH key is still listed in Manusly's Git settings
- Regenerate and re-add the key if necessary
Host Key Verification Failed
If Git cannot verify GitHub's host key:
ssh-keyscan github.com >> ~/.ssh/known_hosts
Run this command in your terminal to add GitHub's host key to your known hosts file.
Visit GitHub Docs for comprehensive documentation, or use the Feedback section in Manusly to submit questions or report issues.
Custom Snippets Guide
Custom snippets are powerful shortcuts that let you insert frequently-used LaTeX commands, environments, and text patterns with just a few keystrokes. Instead of typing the same code over and over, you create a snippet once and use it everywhere.
What Are Snippets?
Think of snippets as text templates on steroids. A snippet can be anything from a simple LaTeX command to complex multi-line environments. When you trigger a snippet, it inserts the template into your document and places your cursor exactly where you need to start typing.
For example, instead of typing:
\frac{numerator}{denominator}
You could create a snippet that lets you type just \frac and then tab through to fill in the numbers automatically.
Opening the Snippets Panel
To manage your custom snippets, follow these steps:
- Open Manusly
- Click on Settings in the top menu bar, or use the keyboard shortcut
Ctrl+,(Windows/Linux) orCmd+,(macOS) - In the Settings window, click on the Custom Snippets tab
Creating Your First Snippet
Let's create a simple fraction snippet together. This is a great starting point to understand how snippets work.
Step 1: Click "Add New Snippet"
At the top of the Snippets panel, you'll see a search bar and a blue button labeled "Add New Snippet". Click this button to open the snippet creation modal.
Step 2: Fill in the Label
The Label is the name that will appear in the autocomplete menu when you type. For a fraction snippet, enter:
\myfrac
You can use any name you like. Some people prefer \frac to override the default, while others use \f for a shorter version.
Step 3: Create the Template
The Snippet Template is where the magic happens. This is the actual LaTeX code that will be inserted. For our fraction, enter:
\frac{${1:numerator}}{${2:denominator}}
Notice the ${1:numerator} and ${2:denominator} parts? These are called placeholders or tab stops. Let's break down what they mean:
${1:numerator}— The first placeholder. When the snippet is inserted, your cursor will appear here with "numerator" selected as default text.${2:denominator}— The second placeholder. Press Tab to jump here after filling in the numerator.- The number (
1,2) determines the order you'll tab through them. - The text after the colon (
numerator,denominator) is optional placeholder text that gets selected when you reach that position.
Step 4: Add a Description
The Description field helps you remember what each snippet does. Enter something like:
Create a fraction with tab stops
This description will appear next to the label in the autocomplete menu, so make it helpful and concise.
Step 5: Choose a Type
The Type dropdown lets you categorize your snippet:
- Snippet — General-purpose text insertions (use this for most cases)
- Command — LaTeX commands starting with a backslash
- Environment — LaTeX environments like
\begin{...}...\end{...}
For our fraction, select Command since \frac is a LaTeX command.
Step 6: Save Your Snippet
Click the "Save Snippet" button. Your new snippet will appear in the list, ready to use!
Using Your Snippets
Now that you've created a snippet, here's how to use it in your LaTeX documents:
- Open or create a
.texfile in Manusly - Start typing the label of your snippet (e.g.,
\myfrac) - A popup menu will appear showing matching completions
- Press Enter to insert the snippet
- The first placeholder will be selected with your cursor ready to type
- Press Tab to jump to the next placeholder
- Press Esc or click away to exit snippet mode
The autocomplete menu appears automatically as you type. You can also press Ctrl+Space (Windows/Linux) or Cmd+Space (macOS) to manually trigger the menu at any time.
Understanding Placeholder Syntax
Mastering placeholders is key to creating powerful snippets. Here's the complete syntax:
Basic Placeholders
${1}
Creates an empty tab stop. Your cursor will appear here, with no default text.
Placeholders with Default Text
${1:default text}
The text after the colon (default text) will be inserted and selected, so you can easily replace it by typing.
Numbering Order
The numbers determine tab order. You don't have to use consecutive numbers—this lets you insert new placeholders in the middle later:
${1:First} ${2:Second} ${3:Third}
Or with gaps for future expansion:
${1:First} ${5:Second} ${10:Third}
Example Snippets
Here are some practical examples to inspire your own snippets:
Mathematics
Label: \matrix
Template:
\begin{pmatrix}
${1:a} & ${2:b} \\
${3:c} & ${4:d}
\end{pmatrix}
Description: 2x2 matrix with tab stops
Type: Environment
Document Structure
Label: section
Template:
\section{${1:Section Title}}

${2:Content...}
Description: Section with heading and content area
Type: Snippet
Figures
Label: figure
Template:
\begin{figure}[${1:hbt}]
\centering
\includegraphics[width=${2:0.8}\textwidth]{${3:filename}}
\caption{${4:Caption text}}
\label{fig:${5:label}}
\end{figure}
Description: Complete figure environment with caption and label
Type: Environment
Bibliography
Label: \cite
Template:
\cite{${1:key}}
Description: Citation with placeholder for BibTeX key
Type: Command
Tables
Label: table2
Template:
\begin{table}[hbt]
\centering
\begin{tabular}{${1:c|cc}}
\hline
${2:Header 1} & ${3:Header 2} & ${4:Header 3} \\
\hline
${5:Data 1} & ${6:Data 2} & ${7:Data 3} \\
\hline
\end{tabular}
\caption{${8:Table caption}}
\label{tab:${9:label}}
\end{table}
Description: Basic 3-column table with structure
Type: Environment
Managing Existing Snippets
Editing Snippets
To modify an existing snippet:
- In the Snippets panel, find the snippet you want to edit in the list
- Click the pencil icon (edit button) on the snippet card
- The snippet editor will open with all fields pre-filled
- Make your changes to the label, template, description, or type
- Click "Save Snippet" to update it
Deleting Snippets
To remove a snippet you no longer need:
- Find the snippet in the list
- Click the trash icon (delete button) on the snippet card
- A confirmation dialog will appear asking if you're sure
- Click "OK" or "Yes" to confirm the deletion
Warning: Deleted snippets cannot be recovered. Make sure you really want to remove a snippet before confirming.
Searching Snippets
As your collection grows, you can use the search bar at the top of the Snippets panel to find specific snippets. The search looks through:
- Snippet labels
- Descriptions
- Template content
Just type a keyword and the list will filter to show matching snippets in real-time.
Best Practices
Keep Labels Simple
Use short, memorable labels that are easy to type. Consider the frequency of use—common snippets deserve shorter labels.
- Very common:
\f(fraction),\s(section) - Somewhat common:
\fig(figure),\eq(equation) - Less common:
\theorembox,\algorithmenv
Be Consistent with Naming
Develop a naming convention and stick to it. This makes snippets easier to remember and reduces typing errors.
- Use
\prefix for all commands - Use camelCase or underscores for multi-word labels:
\myFigureor\my_figure - Group related snippets with prefixes:
\figsmall,\figwide,\figfull
Write Helpful Descriptions
Your future self will thank you. A good description explains what the snippet does and any special considerations.
- Bad: "figure stuff"
- Better: "Figure with caption"
- Best: "Figure environment, 80% width, includes caption and label"
Use Placeholders Judiciously
More placeholders aren't always better. Include tab stops for parts that change frequently, but hard-code parts that stay the same.
You can use the same placeholder number multiple times to insert the same text in several places. For example: \label{fig:${1:name}} ... \ref{fig:${1:name}} will update both locations when you type in the first placeholder.
Troubleshooting
Snippet Not Appearing in Autocomplete
If your snippet doesn't show up when typing:
- Check that you're in a
.texfile (snippets only work in LaTeX files) - Verify your account is signed in and settings were loaded correctly
- Make sure the snippet was saved (check that it appears in the snippets list)
- Try typing more of the label (autocomplete filters as you type)
- Press
Ctrl+SpaceorCmd+Spaceto force the menu to appear
Snippet Access Message
If you see an unexpected access warning in the snippets area:
- Restart Manusly and reopen Settings
- Confirm your account session is active in Settings → Account
- Update to the latest desktop build
If the issue persists, send a report in Settings → Feedback.
Placeholder Not Working
If tab stops aren't functioning:
- Check that placeholder syntax is correct:
${1:text} - Make sure there's a space after the closing brace:
${1:text} - Don't use nested braces:
${1:{text}}won't work properly - Test with a simple snippet first to rule out complex template issues
Next Steps
Now that you understand how snippets work, here are some ways to become more productive:
- Start with snippets for your most frequently-typed LaTeX patterns
- Look at your existing documents and identify repetitive code that could be snippet-ified
- Build a personal library of snippets tailored to your writing style
- Share your favorite snippets with colleagues to standardize formatting in collaborative projects